Craftsmanship Unveiled: The Art of Building Red Oak Cabinets
Craftsmanship Unveiled: The Art of Building Red Oak Cabinets
I. Introduction
Red oak cabinets hold significant value in interior design due to their timeless appeal, durability, and natural beauty. They add warmth, character, and sophistication to any space, becoming focal points that elevate the overall aesthetics and functionality of a room.
Immerse yourself in the allure of fine craftsmanship as we delve into the meticulous art of building red oak cabinets. Discover the intricate joinery, expert detailing, and dedication that goes into creating these masterpieces, resulting in stunning, one-of-a-kind pieces that stand the test of time.
II. Understanding Red Oak Wood
Red oak wood boasts impressive characteristics and qualities. It is renowned for its durability, strength, and resistance to wear and tear. With its distinct grain patterns, it offers a natural beauty that adds warmth and charm to any space.
Red oak cabinets impress with their exceptional durability and strength, built to withstand the rigors of daily use. Their alluring grain patterns add depth and character, further enhancing their aesthetic appeal and making them a lasting investment for any home.
Red oak is a popular choice for cabinet making due to its combination of durability, affordability, and aesthetic appeal. Its strength allows for sturdy construction, while its attractive grain patterns and versatility make it a versatile and timeless option for creating beautiful cabinets.

III. Preparing for Cabinet Building
A. Gathering Tools and Materials
Building red oak cabinets requires a range of tools. Here is a comprehensive list: table saw, miter saw, drill, router, chisels, clamps, tape measure, square, sandpaper, brushes, finish applicators, and safety equipment like goggles and gloves.
Essential materials for building red oak cabinets include red oak lumber for the cabinet construction, cabinet hardware such as hinges and handles, drawer slides, screws, nails, wood glue, sandpaper, stain or paint for finishing, and a protective clear coat or varnish.
B. Taking Accurate Measurements
- Precise measurements are crucial for a successful cabinet project. They ensure proper fit, functionality, and alignment. Accurate measurements prevent gaps, uneven surfaces, and ill-fitting doors or drawers, resulting in a polished, professional-looking final product that meets the desired specifications.
-To measure properly for a cabinet project:
1. Use a tape measure to measure the width, height, and depth of the cabinet space.
2. Measure multiple times to ensure accuracy.
3. Take note of any obstructions or irregularities that may affect measurements.
4. Transfer measurements to a sketch or design plan for reference during construction.
IV. Designing Red Oak Cabinets
A. Choosing the Cabinet Style
Various cabinet styles beautifully complement red oak wood. Traditional styles with raised panel doors evoke elegance. Modern styles with sleek lines and minimalistic designs highlight the wood's natural grain. Rustic styles with distressed finishes showcase its warm, inviting charm.
Traditional style embraces ornate details, raised panel doors, and intricate moldings, exuding elegance and sophistication. Modern style focuses on clean lines, minimalist aesthetics, and sleek finishes for a contemporary look. Rustic style emphasizes natural elements, distressed finishes, and a warm, inviting ambiance with a touch of nostalgia.
B. Planning Cabinet Layout and Functionality
When determining cabinet layout, assess available space and needs. Consider storage requirements, workflow, and accessibility. Optimize space with tall cabinets or pull-out shelves. Plan for countertop space, appliance placement, and adequate clearance. Customize the layout to suit your specific requirements and maximize functionality.
Considerations such as storage requirements involve assessing the amount and type of items to be stored. Accessibility involves designing cabinets that are easy to reach and use. Aesthetics encompass choosing cabinet styles, finishes, and hardware that enhance the overall visual appeal of the space.

V. Building Red Oak Cabinets: Step-by-Step Process
A. Cutting and Preparing Red Oak Wood
To cut red oak lumber for cabinets:
1. Measure and mark the desired dimensions on the lumber.
2. Use a table saw or circular saw to make straight cuts along the marked lines.
3. Ensure the saw blade is sharp and set to the appropriate depth.
4. Double-check measurements and trim as needed for precision.
Tips for preparing red oak wood for assembly:
1. Remove any rough edges or splinters with sandpaper.
2. Use a wood conditioner before staining to ensure an even finish.
3. Pre-drill pilot holes to prevent splitting when inserting screws or nails.
4. Keep the wood clean and dry to maintain its quality during the assembly process.
B. Cabinet Joinery Techniques
1. Popular joinery techniques in cabinet making include dovetail joints for strong, interlocking connections, mortise and tenon joints for stability, and pocket hole joinery for discreet and efficient assembly. Each technique offers unique advantages based on the desired outcome and skill level.
2. Dovetail joints are renowned for their strength and aesthetic appeal, creating interlocking connections. Mortise and tenon joints provide stability and are versatile for various cabinet components. Pocket hole joinery offers a quick and discreet method using angled holes and screws, ideal for efficient assembly.
C. Cabinet Assembly and Installation
To assemble cabinet components:
1. Lay out the pieces according to the design plan.
2. Apply wood glue to the joints.
3. Align the pieces and secure with clamps.
4. Use screws or nails to reinforce joints.
5. Double-check alignment and let the glue dry before removing clamps.
To ensure proper alignment and stability during cabinet assembly:
1. Use a square to check for 90-degree angles.
2. Measure and adjust as needed before securing.
3. Reinforce joints with additional screws or dowels.
4. Apply even pressure when clamping to prevent shifting.
5. Allow sufficient drying time for glue to fully set before handling.

VI. Finishing and Enhancing Red Oak Cabinets
A. Sanding and Smoothing
1. Sanding plays a vital role in achieving a flawless finish for red oak cabinets. It smooths rough surfaces, removes imperfections, and promotes better stain absorption. Sanding creates a uniform and polished surface, enhancing the overall beauty and professional look of the cabinets.
2. To achieve proper sanding for red oak cabinets:
1. Start with coarse-grit sandpaper and gradually move to finer grits.
2. Sand in the direction of the wood grain.
3. Apply even pressure and use long, smooth strokes.
4. Remove dust between sanding stages.
5. Finish with a final light sanding for a smooth and ready-to-finish surface.
B. Choosing the Right Finish
Different finish options suitable for red oak cabinets include varnish, oil-based finishes, and lacquer. Varnish offers durability and enhances the wood's natural beauty. Oil-based finishes provide a rich, warm look. Lacquer offers a smooth and glossy finish with quick drying times.
Varnish: Pros - Durable, enhances wood grain, provides long-lasting protection. Cons - Longer drying time, can yellow over time, requires proper ventilation.
Oil Finish: Pros - Deepens wood color, easy to apply, nourishes the wood. Cons - Requires more maintenance, may take longer to dry, less resistant to water.
Lacquer: Pros - Quick drying, creates a smooth and glossy finish, durable. Cons - Strong odor during application, less forgiving for touch-ups, may require more advanced application techniques.

VII. Maintenance and Care for Red Oak Cabinets
Tips for cleaning, polishing, and maintaining red oak cabinets:
1. Regularly dust and wipe with a soft, damp cloth.
2. Use a mild wood cleaner for deeper cleaning.
3. Avoid harsh chemicals or abrasive cleaners.
4. Apply furniture polish or wax to enhance shine and protect the wood.
5. Handle spills promptly and avoid excessive moisture exposure.
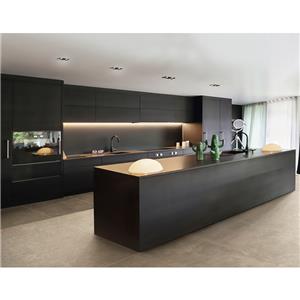
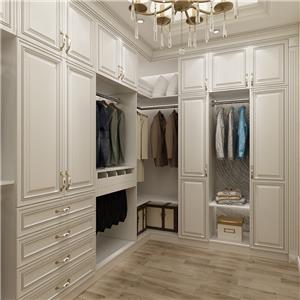
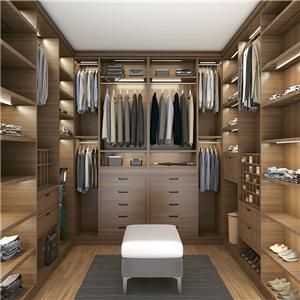
VIII. Showcasing Fine Craftsmanship: Red Oak Cabinet Inspirations
Different design styles for red oak cabinets include traditional with raised panel doors, modern with sleek lines, and rustic with distressed finishes. Innovative features can include smart storage solutions, integrated lighting, and custom organizational inserts for enhanced functionality.

IX. Conclusion
Building red oak cabinets is an art that combines craftsmanship, precision, and creativity. It involves meticulous planning, precise measurements, skilled joinery, and attention to detail. The result is stunning, durable cabinets that enrich interior spaces with timeless beauty and functional elegance.
Well-crafted cabinetry embodies the beauty of fine craftsmanship, showcasing the seamless integration of form and function. With their timeless design and durable construction, they become cherished elements of a space, providing lasting appeal and enhancing the aesthetics of any interior.