Common Cabinet Installation Issues in North America and How to Solve Them
Common Cabinet Installation Issues in North America and How to Solve Them
Meta Description: Cabinet installation not going smoothly? Learn how to diagnose and fix the most common issues faced during North American cabinet installations, from out-of-level floors to appliance gaps.

Introduction: The High-Stakes Puzzle of Cabinet Installation
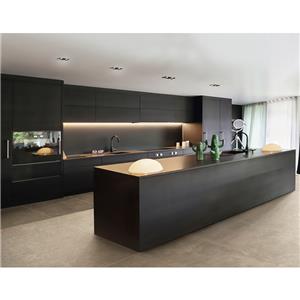
In North America, cabinet installation is the defining moment of any kitchen renovation. It's where the meticulous planning of designers meets the practical reality of the home's structure. Even with perfect boxes from the factory, the installation process is fraught with potential pitfalls. From century-old farmhouses with sagging floors to modern condos with concrete walls, the North American housing landscape presents unique challenges. A professional-looking finish hinges on anticipating and solving these common issues before they compromise the entire project. This guide provides contractors, serious DIYers, and homeowners with a practical diagnostic and repair manual for the most frequent cabinet installation problems.
Part 1: The Foundation Issues: Walls, Floors, and Layout
Problems that stem from the space itself are the most critical to address first.
Issue 1: Out-of-Level Floors and Walls
The Problem: No floor or wall is perfectly level or plumb. A severe slope (common in older homes) will cause cabinets to rock, doors to misalign, and countertops to have unsightly gaps at the wall.
The Solution:
Find the High Point: Use a 6-foot level or laser level to map the floor. Identify the highest spot in the room—this is where your first base cabinet will be leveled from.
Shim from the High Point: Install ledger boards or temporary supports. Place the first cabinet, then use composite or plastic shims under the cabinet's base (never just at the front) to bring it perfectly level. Tighten the cabinet to the wall, driving screws through the shim clusters to lock them in place.
Deal with Walls: Use a stud finder and level to mark plumb lines on the wall. Cabinets should be hung from these lines. For severely out-of-plumb walls, you may need to "scribe" the cabinet's back or side (shave material away) so it sits flush, or plan for filler strips of varying widths.
Issue 2: Inaccurate or Missing Layout Lines
The Problem: Starting installation without clear, comprehensive reference lines leads to a domino effect of misalignment. Cabinets drift, appliance openings are wrong, and the entire run is off.
The Solution:
Establish the "Control Line": This is a critical, laser-straight vertical line on the wall, typically 24 ½ inches from the back wall (for a 24-inch deep cabinet + backsplash allowance). It marks the front edge of all base cabinets.
Mark All Critical Heights: Draw a level line on the wall for the top of the base cabinets (usually 34 ½" from the high point to allow for a 1 ½" countertop to reach 36"). Draw another for the bottom of the wall cabinets (typically 54" from the countertop line for an 18" gap).
Dry-Fit and Mark Appliance Openings: Before final mounting, position cabinets and physically mark the exact openings for the fridge, range, and dishwasher on the floor and walls.

Part 2: Cabinet-Specific Installation Challenges
Issue 3: Misaligned Face Frames (for Framed Cabinetry)
The Problem: After clamping and screwing cabinets together, the front face frames are not perfectly flush, creating a visible "lip" or uneven surface.
The Solution:
Use Proper Clamping Technique: Before screwing, use bar clamps to pull the face frames tightly together. Place a scrap wood block between the clamp and the cabinet to prevent denting.
Pre-Drill and Screw Strategically: Drill pilot holes through the stile (vertical frame piece) of one cabinet into the stile of the next. Use 2 ½" cabinet screws, driving two screws at the top and two at the bottom.
Check Continuously: Use a long, straight edge across the fronts of multiple cabinets to ensure they are all in the same plane.
Issue 4: Sagging or Improperly Supported Wall Cabinets
The Problem: Wall cabinets feel unstable, doors don't align, or there's a risk of pulling away from the wall—especially when loaded with heavy dishware.
The Solution:
Find and Hit Studs: This is non-negotiable. Use a stud finder and mark the center of every stud in the installation zone. Cabinets must be screwed into studs with long enough screws (at least 3").
Use a Temporary Support System: Install a cleat (a perfectly level 1x3 board) along your wall cabinet height line. Screw it into the studs. This provides a solid ledge to rest the cabinets on while you secure them, ensuring perfect level and eliminating sag during installation.
Reinforce for Heavy Loads: For long runs or heavy materials (like glass doors), install a vertical support brace or a French cleat system for superior weight distribution.
Issue 5: Gaps and Misalignment with Appliances
The Problem: Unsightly or uneven gaps around the refrigerator or dishwasher, or a range that doesn't sit flush with the cabinets.
The Solution:
For Fridges: Always follow the manufacturer's specification for "clearance width." Standard cabinets are 24" deep; most fridges are deeper. Plan for a 24" deep cabinet on either side and a countertop overhang. The "counter-depth" look requires a filler panel behind the fridge cabinet.
For Dishwashers: Ensure the opening is exactly as specified (typically 24" wide). The cabinet must be perfectly level side-to-side and front-to-back, or the dishwasher will not slide in correctly and the door will be misaligned.
For Ranges/Cooktops: Provide the exact cutout dimensions. For slide-in ranges, the countertop should have a small overhang on each side; the range's flange will sit underneath it for a seamless look.
Part 3: Finishing and Functional Issues
Issue 6: Doors and Drawers That Don't Align or Function Smoothly
The Problem: After installation, doors are uneven, drawers rub, or soft-close mechanisms don't work.
The Solution:
Understand the Hinge: Modern concealed hinges (Blum, Grass, etc.) have three-way adjustment: in/out (depth), up/down, and left/right. Use a screwdriver to make micro-adjustments until alignment is perfect.
Check for Obstructions: Ensure doors aren't hitting adjacent cabinets, handles, or walls. Sand or plane down doors slightly if necessary.
Inspect Drawer Slides: Ensure slides are level, parallel, and fully engaged. For undermount slides, check that the drawer box is square and the mounting brackets are correctly positioned.

Issue 7: Visible Gaps at Ceilings, Corners, and End Walls
Problem: Gaps at the top where cabinets meet an uneven ceiling, or at the end of a run where cabinets meet a wall that's not plumb.
Solution:
Crown Molding & Light Rails: These are designed to conceal ceiling gaps. They can be coped or sprung to fit uneven surfaces.
Filler Strips: These are your best friend for finishing. Rip a filler strip to a custom width to bridge the gap between the last cabinet and the wall. It can be scribed to follow an irregular wall profile for a perfect fit.
Scribing: For a flawless finish, "scribe" the cabinet side or filler strip. Set a compass to the width of the gap, run it along the wall, and then carefully remove the marked material with a planer or sander so the cabinet contour matches the wall.
Issue 8: Damaged Cabinets Upon Delivery or During Installation
The Problem: Dings, scratches, or broken components discovered during unpacking or installation.
The Solution:
Inspect Immediately: Do not sign off on delivery until you've inspected every piece in the presence of the delivery crew. Note any damage on the bill of lading.
Contact Supplier Promptly: Have clear photos and the cabinet/part numbers ready. Reputable suppliers will ship replacement parts or doors quickly.
Minor Repair On-Site: For small dings in finished surfaces, use a color-matched wax filler stick or touch-up pen from the cabinet manufacturer. For raw wood, use wood filler, sand, and carefully re-stain or paint.
Part 4: The Proactive Installer's Checklist
Prevent issues before they start by following this sequence:
PREP: Remove old cabinets, repair walls, and ensure utilities are correctly located/relocated.
MEASURE & MARK: Locate and mark all studs. Establish and mark the control line, base cabinet height line, and wall cabinet height line.
DRY FIT: Assemble sections on the floor if possible. Check for appliance fit.
INSTALL FROM THE HIGH POINT: Start with the corner or sink base cabinet. Level and secure it first.
WORK METHODICALLY: Add adjacent cabinets, clamping and screwing face frames together, checking for level and plumb as you go.
HANG WALL CABINETS: Using a temporary cleat for support.
INSTALL HARDWARE & ADJUST: Put on doors and drawers. Take the time to make meticulous adjustments to all hinges and slides.
ADD TRIM & FINISHING: Install filler strips, crown molding, toe kicks, and light rails.
Conclusion: Precision, Patience, and Preparation
Successful cabinet installation in North American homes is a test of problem-solving. It demands respect for the home's inherent imperfections and a methodical approach to overcoming them. By understanding these common issues—foundation irregularities, alignment challenges, and finishing gaps—and applying the targeted solutions, you transform a complex puzzle into a showcase of craftsmanship.
Whether you're a professional installer or a dedicated homeowner, remember that the extra hour spent on perfect layout lines and meticulous leveling will save a full day of frustrating corrections later. The goal is a kitchen that looks flawlessly built-in, where the cabinets appear to have grown seamlessly from the home itself.
How to buy kitchen cabinets? ➡
Exclusive Interview with Homeowner ➡
Struggling to turn around in your kitchen? ➡
Is the trend towards "de-living-rooming" design catching on? ➡